Gem Nails: DIY Tutorial
Hi!
Recently, I tried these ‘Gem
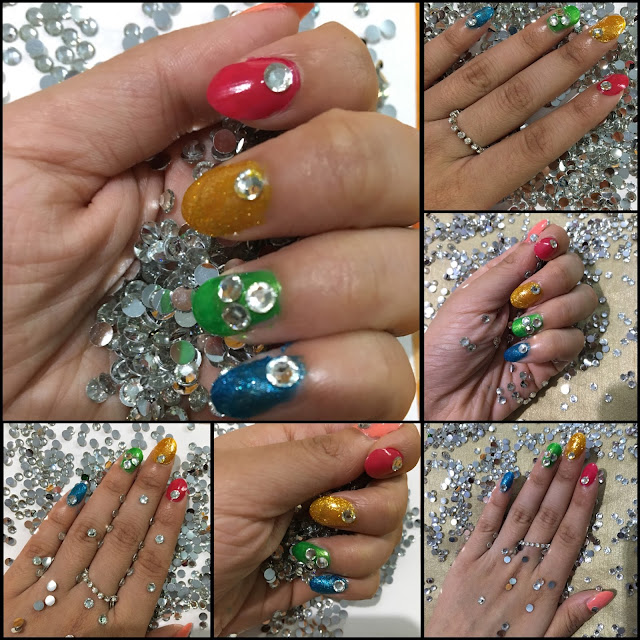
Nails’, which accidentally, without being messed up, look adorable :D
Check them out:
 |
| Chic Gem Nails: Best of Party/ Festive look |
I call them ‘Gem Nails’ due to two
reasons: First is that, I used gems (or Rhinestones actually) to decorate these
nails, and second, the colors of these nails are similar to ‘Cadbury Gems’ we
used to eat in our childhood (well, I still love eating them, though :P )
Then, I applied a transparent
base coat as I always do, and waited for it to dry.
Basically, what I wanted was ‘Rainbow
nails’, but god gave us only five finger, right? , so I had to use only five
colors, hahaha XD
So, I first arranged the selected
colors in the order similar to that of a rainbow. Then, I began applying the
nail colors, and quickly pasted the ‘Rhinestones’ to my nails, so that they stick
perfectly, and do not chip off. This way, I did all my five nails, and finally,
in the end I applied a transparent top coat to ‘secure’ my nail paint.
PRO Tip: Carefully place the gems on your nails, without
ruining your nail paint. And remember to be quick, and place the gems on your
fingers, before your nail color dries, this will help them stick better.
Confidently carry this party look
with a beautiful ring. ENJOY :D
Hope you creative design guys like it! You may please feel free to rate this sketch in comments below and also suggest your intelligent suggestions :)
Follow the blog on all social sites: Facebook, Twitter and Instagram- @ilovesketchart to get latest updates!
PS: Also follow this page for awesome nail art tutorials: @_creative_nailarts (page admin: Lizza Mittal)
Videos you may like:


Comments
Post a Comment